

How To Repair Bike Tire Puncture
Getting a flat tyre anywhere or anytime is annoying, just if you lot don't know how to fix information technology, it can exist a scary predicament.
Not knowing how to get your cycle re-inflated and back on the road tin can make riding solo an un-nerving and ride limiting.
Fifty-fifty with a pair of the best road bicycle tyres, ideal gravel cycle tyres or even best puncture-proof tyres, you tin can never guarantee against a flat bike.
It'south not just tyres either, take some time to get to know your rubber and Schrader vs presta valves in our guide on bike inner tubes (opens in new tab)which explains all about them.
Even so, with our guide for how to fix a puncture and mend an innertube, you lot'll soon be super confident in your own abilities to go on safe and get domicile from whatever bike ride.
We've explained the easy steps in the video in a higher place, and there's a picture guide that takes you through the steps underneath. However, as with everything in life, practise makes perfect. Once you've watched or read, make sure you lot spend some time having a go yourself.
E'er make sure yous endeavour out your new skills at home in the warm and dry before setting off on your next take chances where the added elements of weather, light and time may be confronting yous.
Footstep past step guide to fixing a puncture
Step one: remove the wheel from the frame

Brand sure y'all are in your smallest sprocket before removing removing your rear bicycle.
(Image credit: Getty)
Front wheel removal
Once you lot realise y'all have a flat, the first chore for fixing a bike puncture is to remove the wheel.
It's a unproblematic job of pulling downward and unscrewing your quick release until you have enough slack to remove the bike. If you lot are using Thru Axles, you'll need to either just unwind the leaver and remove the bolt entirely.
Some cycle'south don't have a tool free quick bike release, and so it's actually important to check what system your bike is using. You might observe that it requires you to carry the correct size allen primal for some Thru Axels
Some commuter bikes uses bike nuts - if this is the case, you'll need a spanner - often 15mm - to loosen these off before y'all can remove the wheel.
If yous have disc brakes you can simply pop the front wheel out and gently lower the bike downwards on information technology's forks.
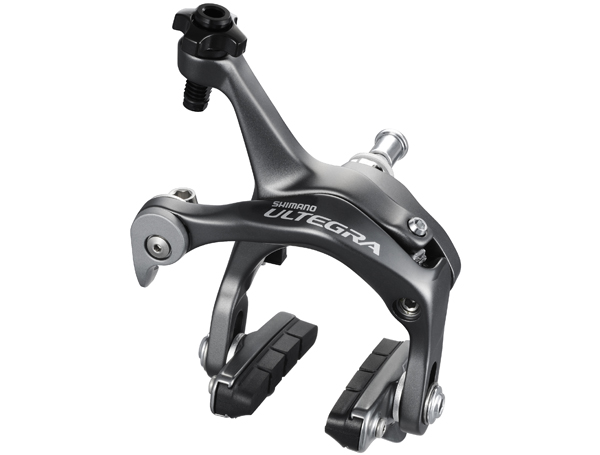
To let off a caliper brake, elevator the leaver, on the left paw side in this image from down to up.
(Image credit: Future)
If you are using rim brakes, you'll need to let off the brakes.
On caliper brakes, like the one above you can only lift the little leaver from downwardly to upward, which will slacken the cablevision to open the brakes enough to allow the wheel and tyre to come out.
How to prepare a puncture: remove the wheel
If you have cantilever or 5-brakes, as in the image above, you will merely demand to squeeze the brakes together and pop the cablevision out of it's housing, again to let the brakes to open wide enough to permit the wheel and tyre to laissez passer through.
Rear wheel removal
If it is a rear wheel puncture, you need to have all the above steps, but ensure you have adjusted the bike gears (opens in new tab) so that the chain is on the smallest chainring on the crankset and the smallest sprocket on the rear cassette. This makes rear bicycle removal easier as the chain is at it's slackest.
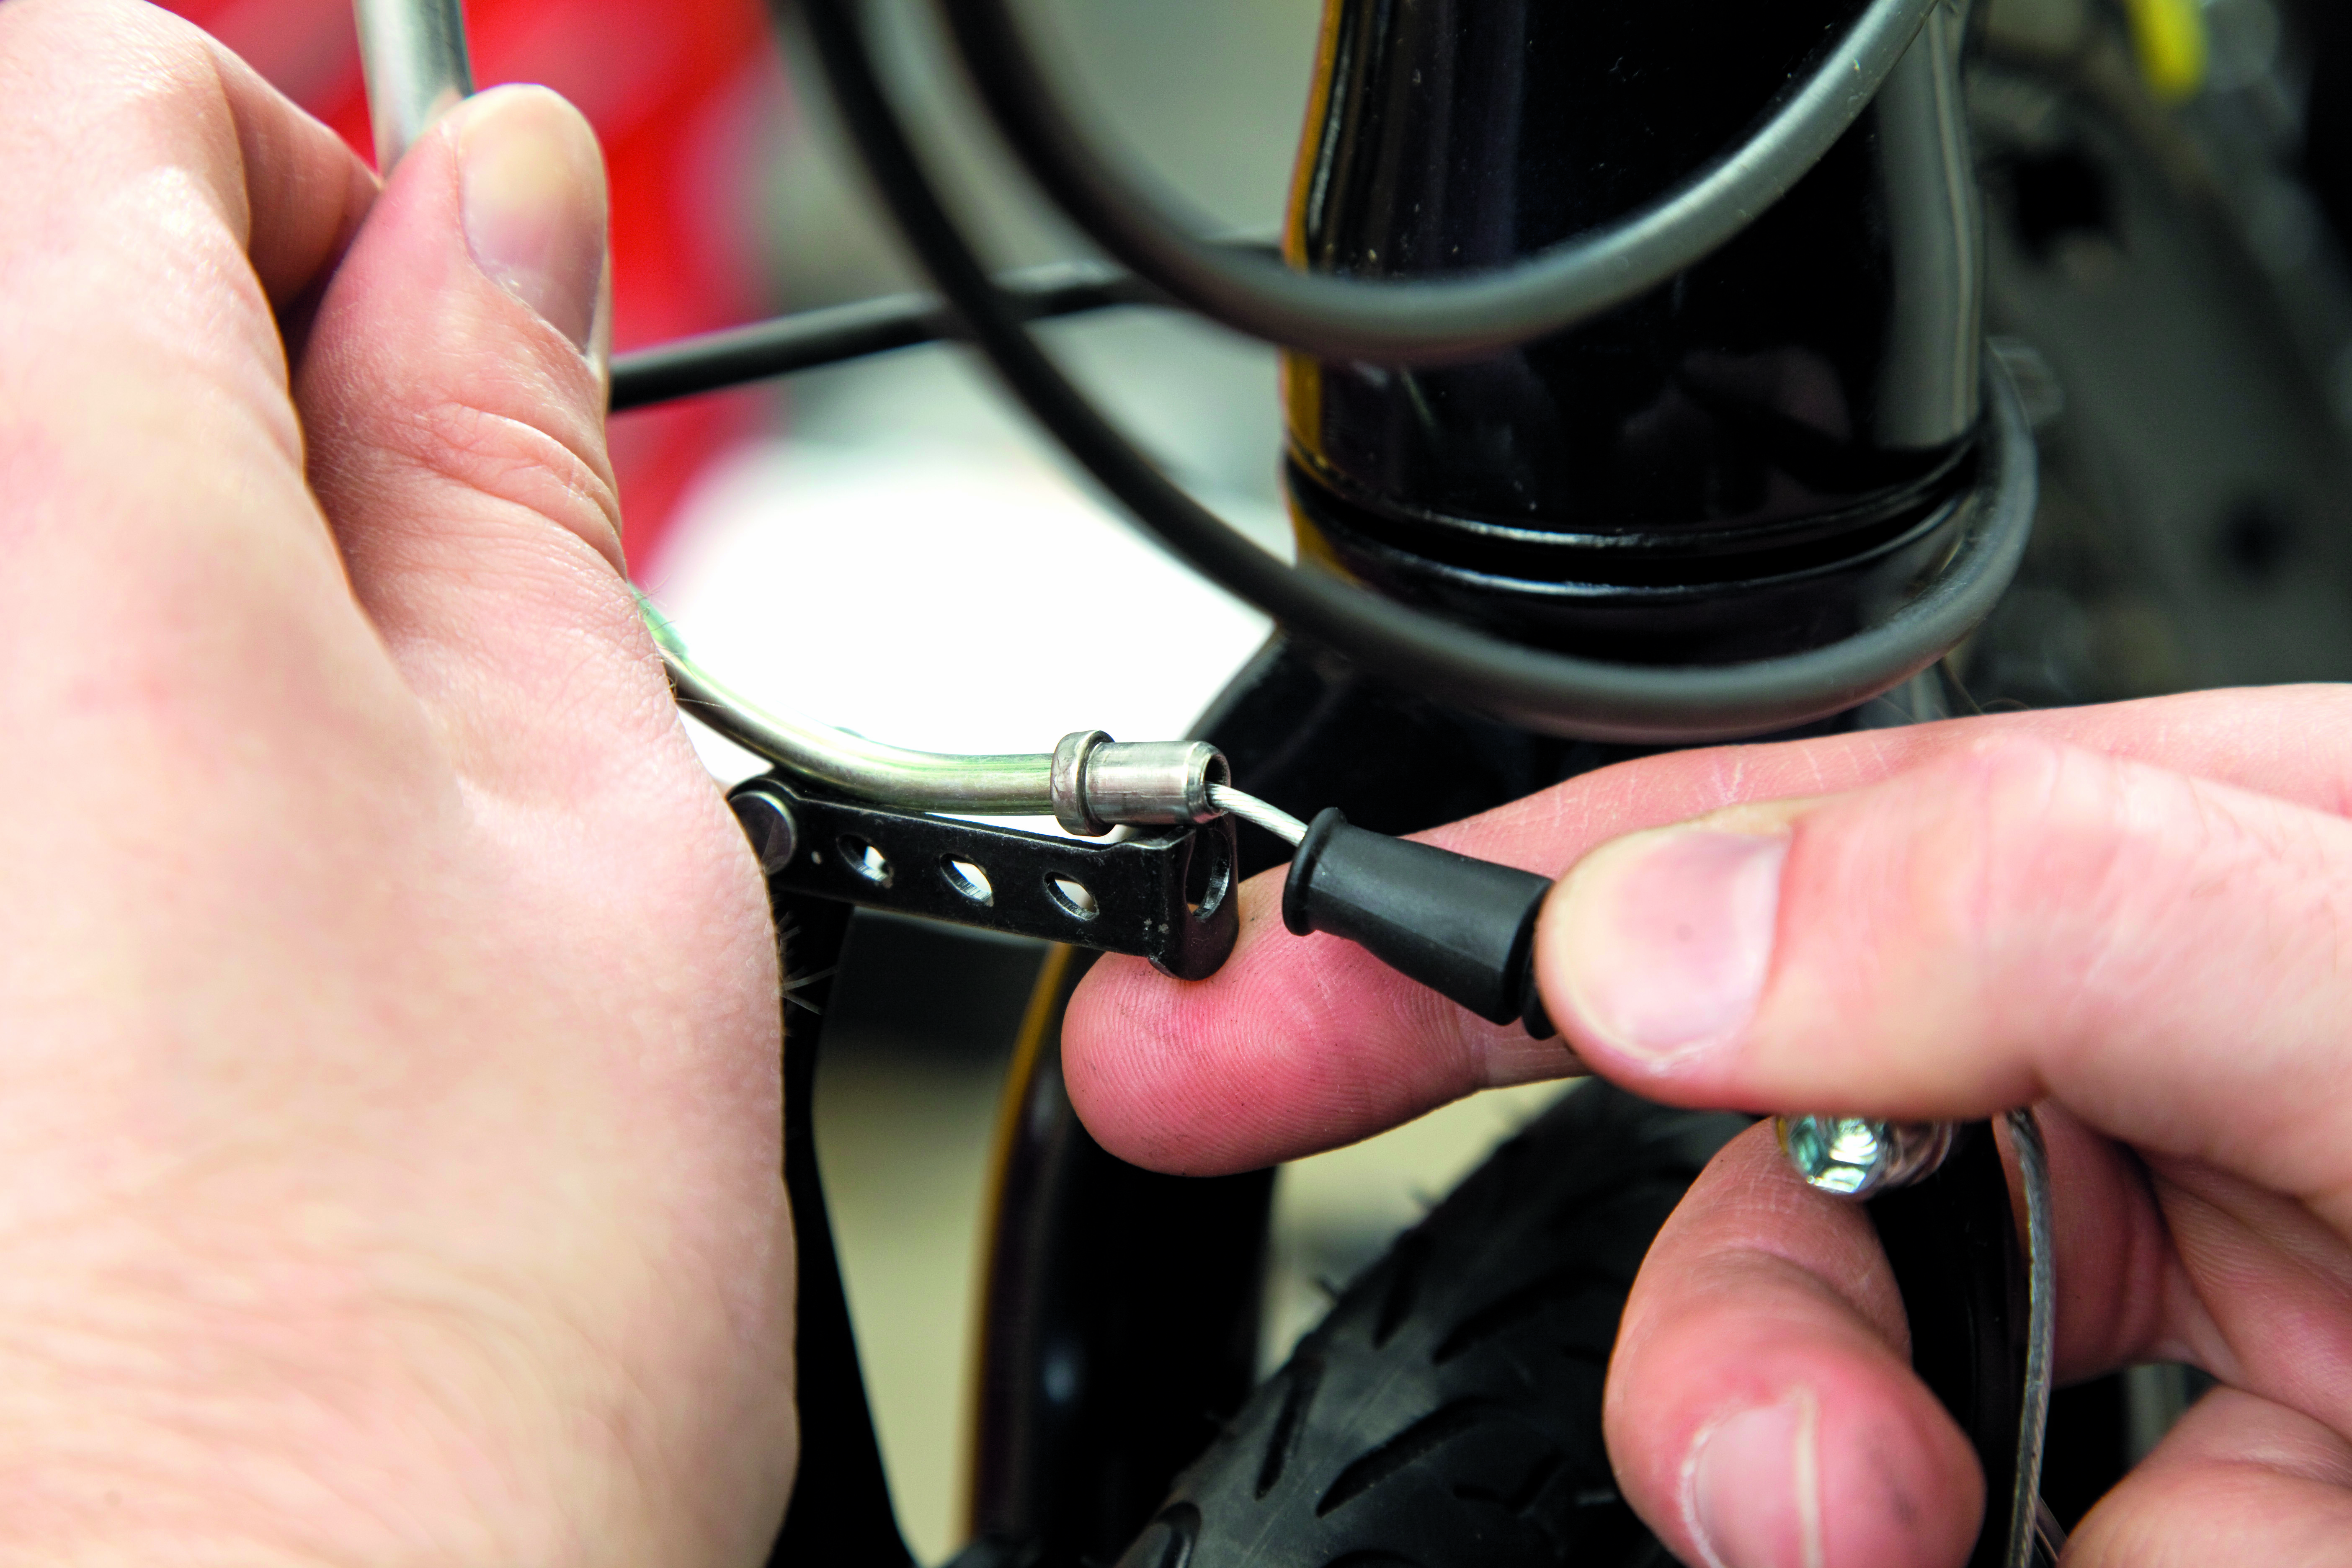
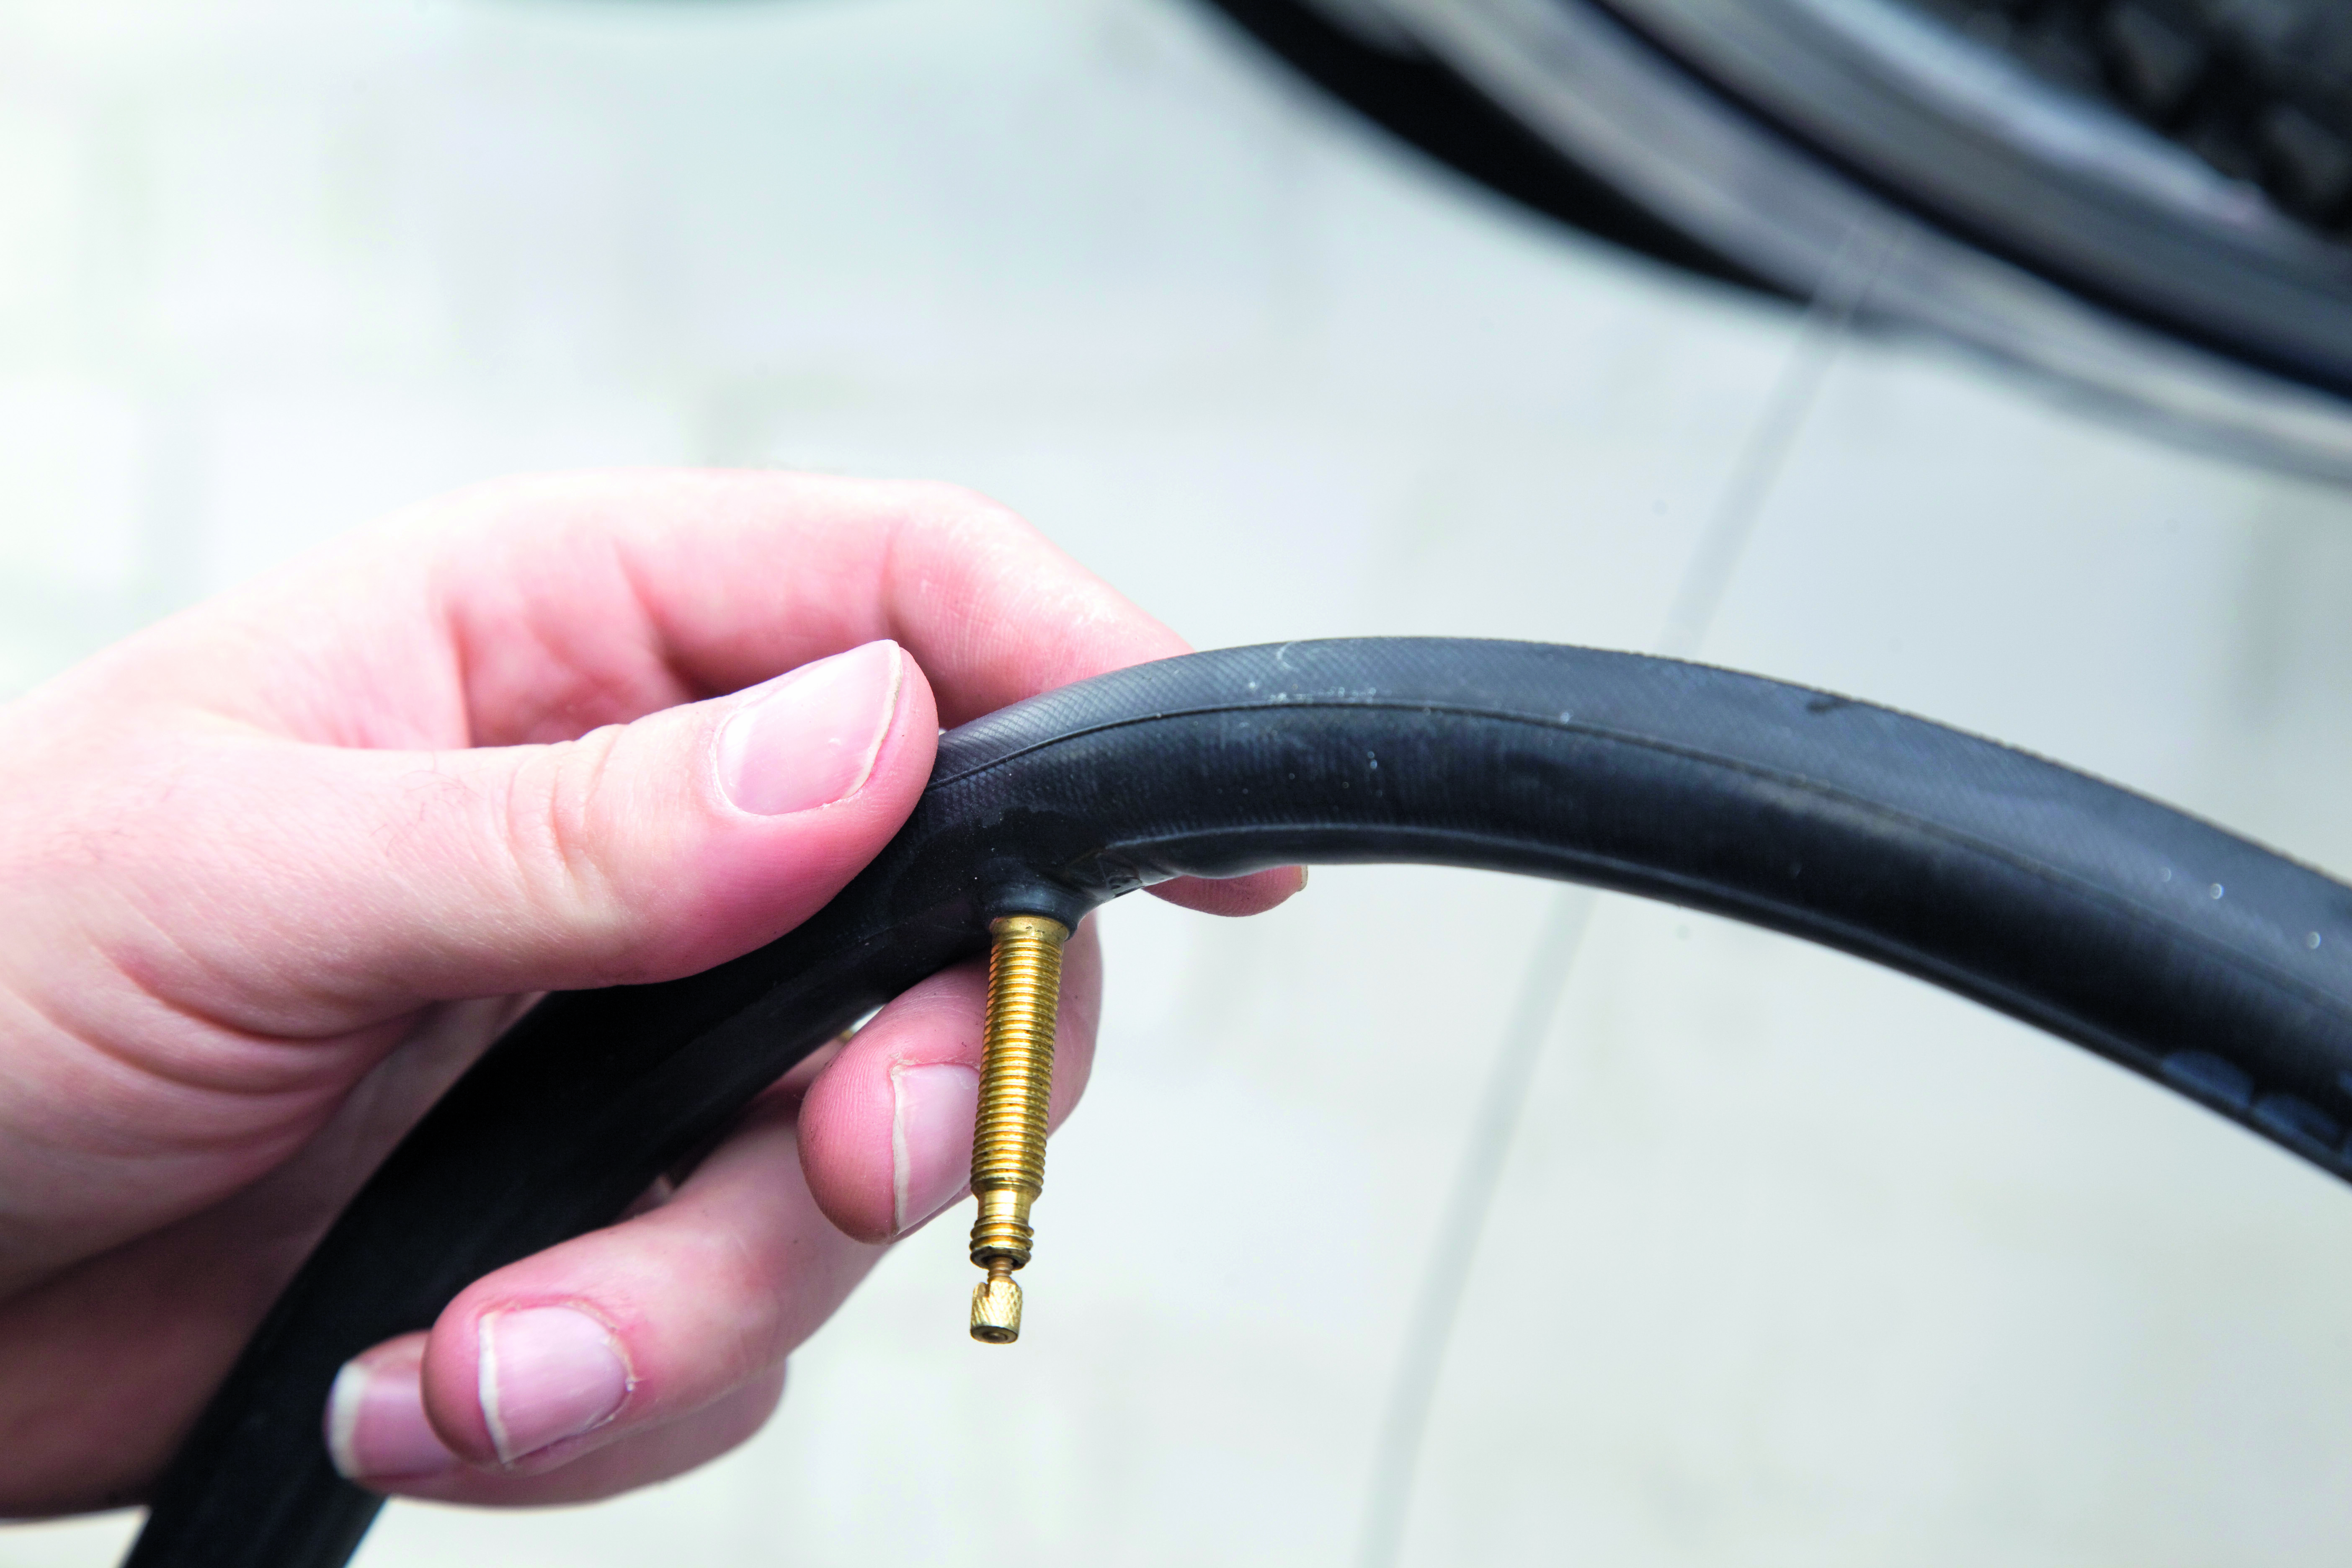
Step 2: remove the valve cap and retaining nut
Take the dust embrace off the valve
Take off the valve cap (the little piece of black plastic over the valve) and unscrew the valve retaining nut (the round ring siting against the rim) if there is one. Button the end of the valve to fully deflate the tube if information technology's not already empty of air.
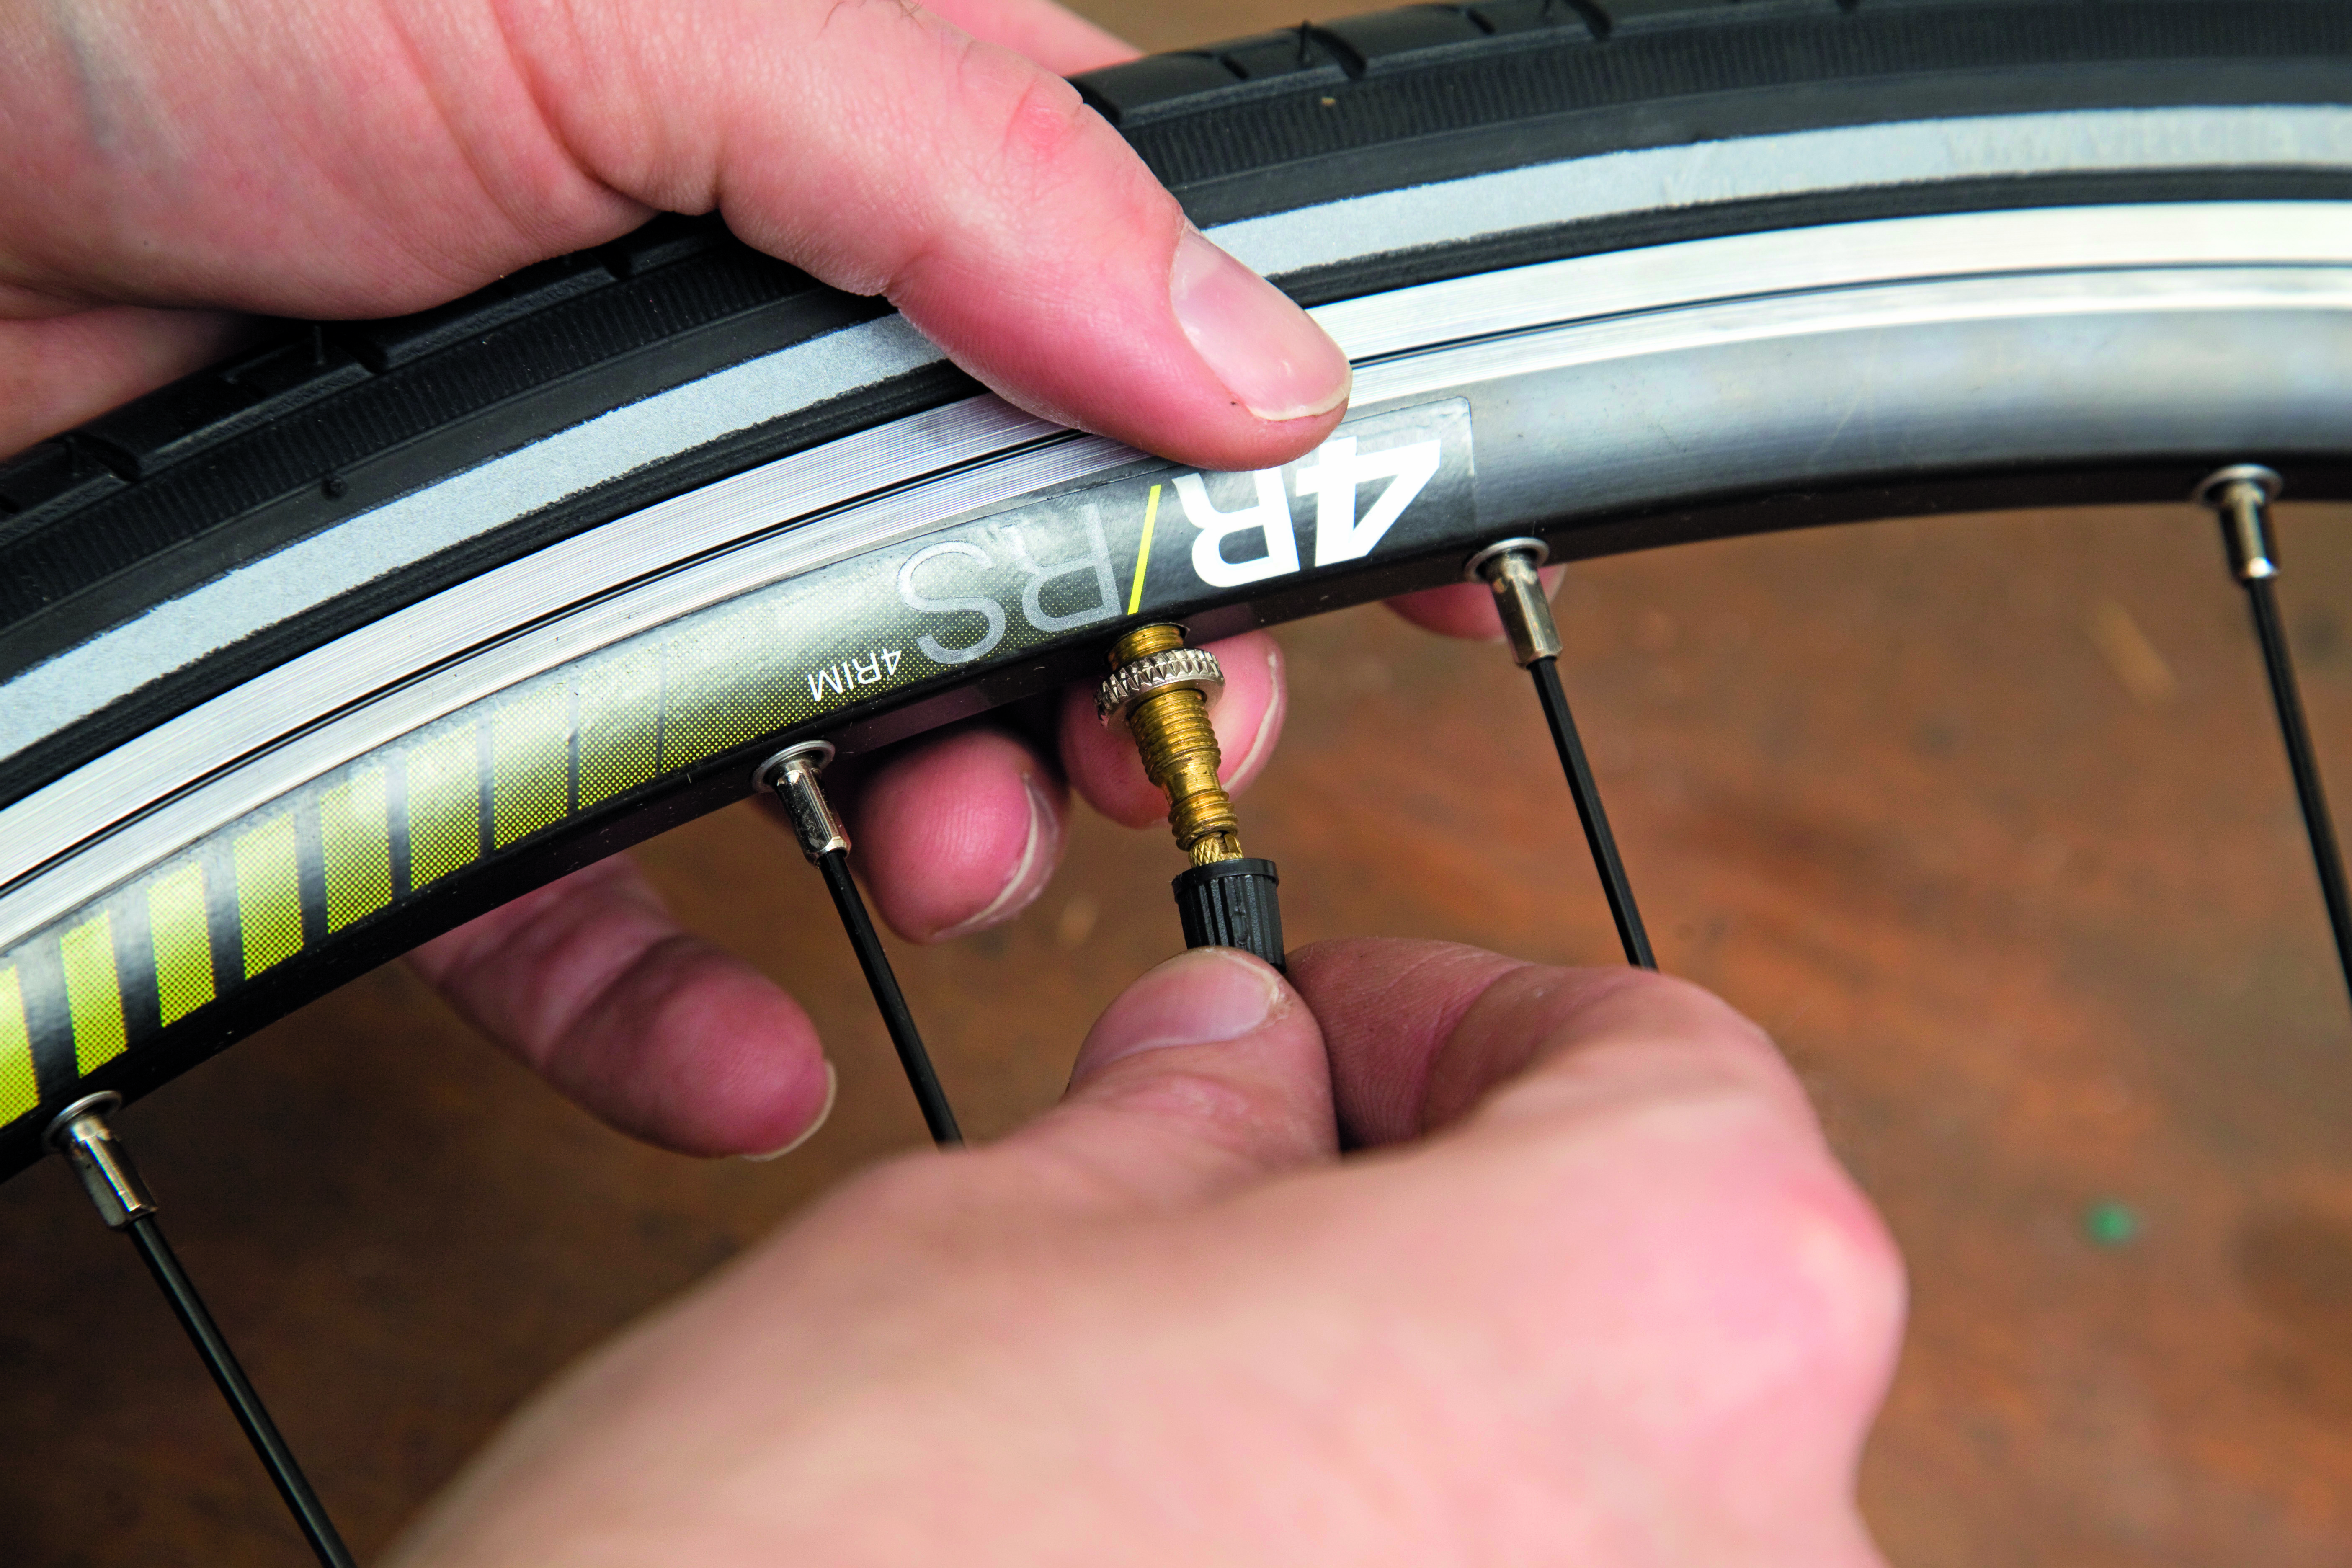
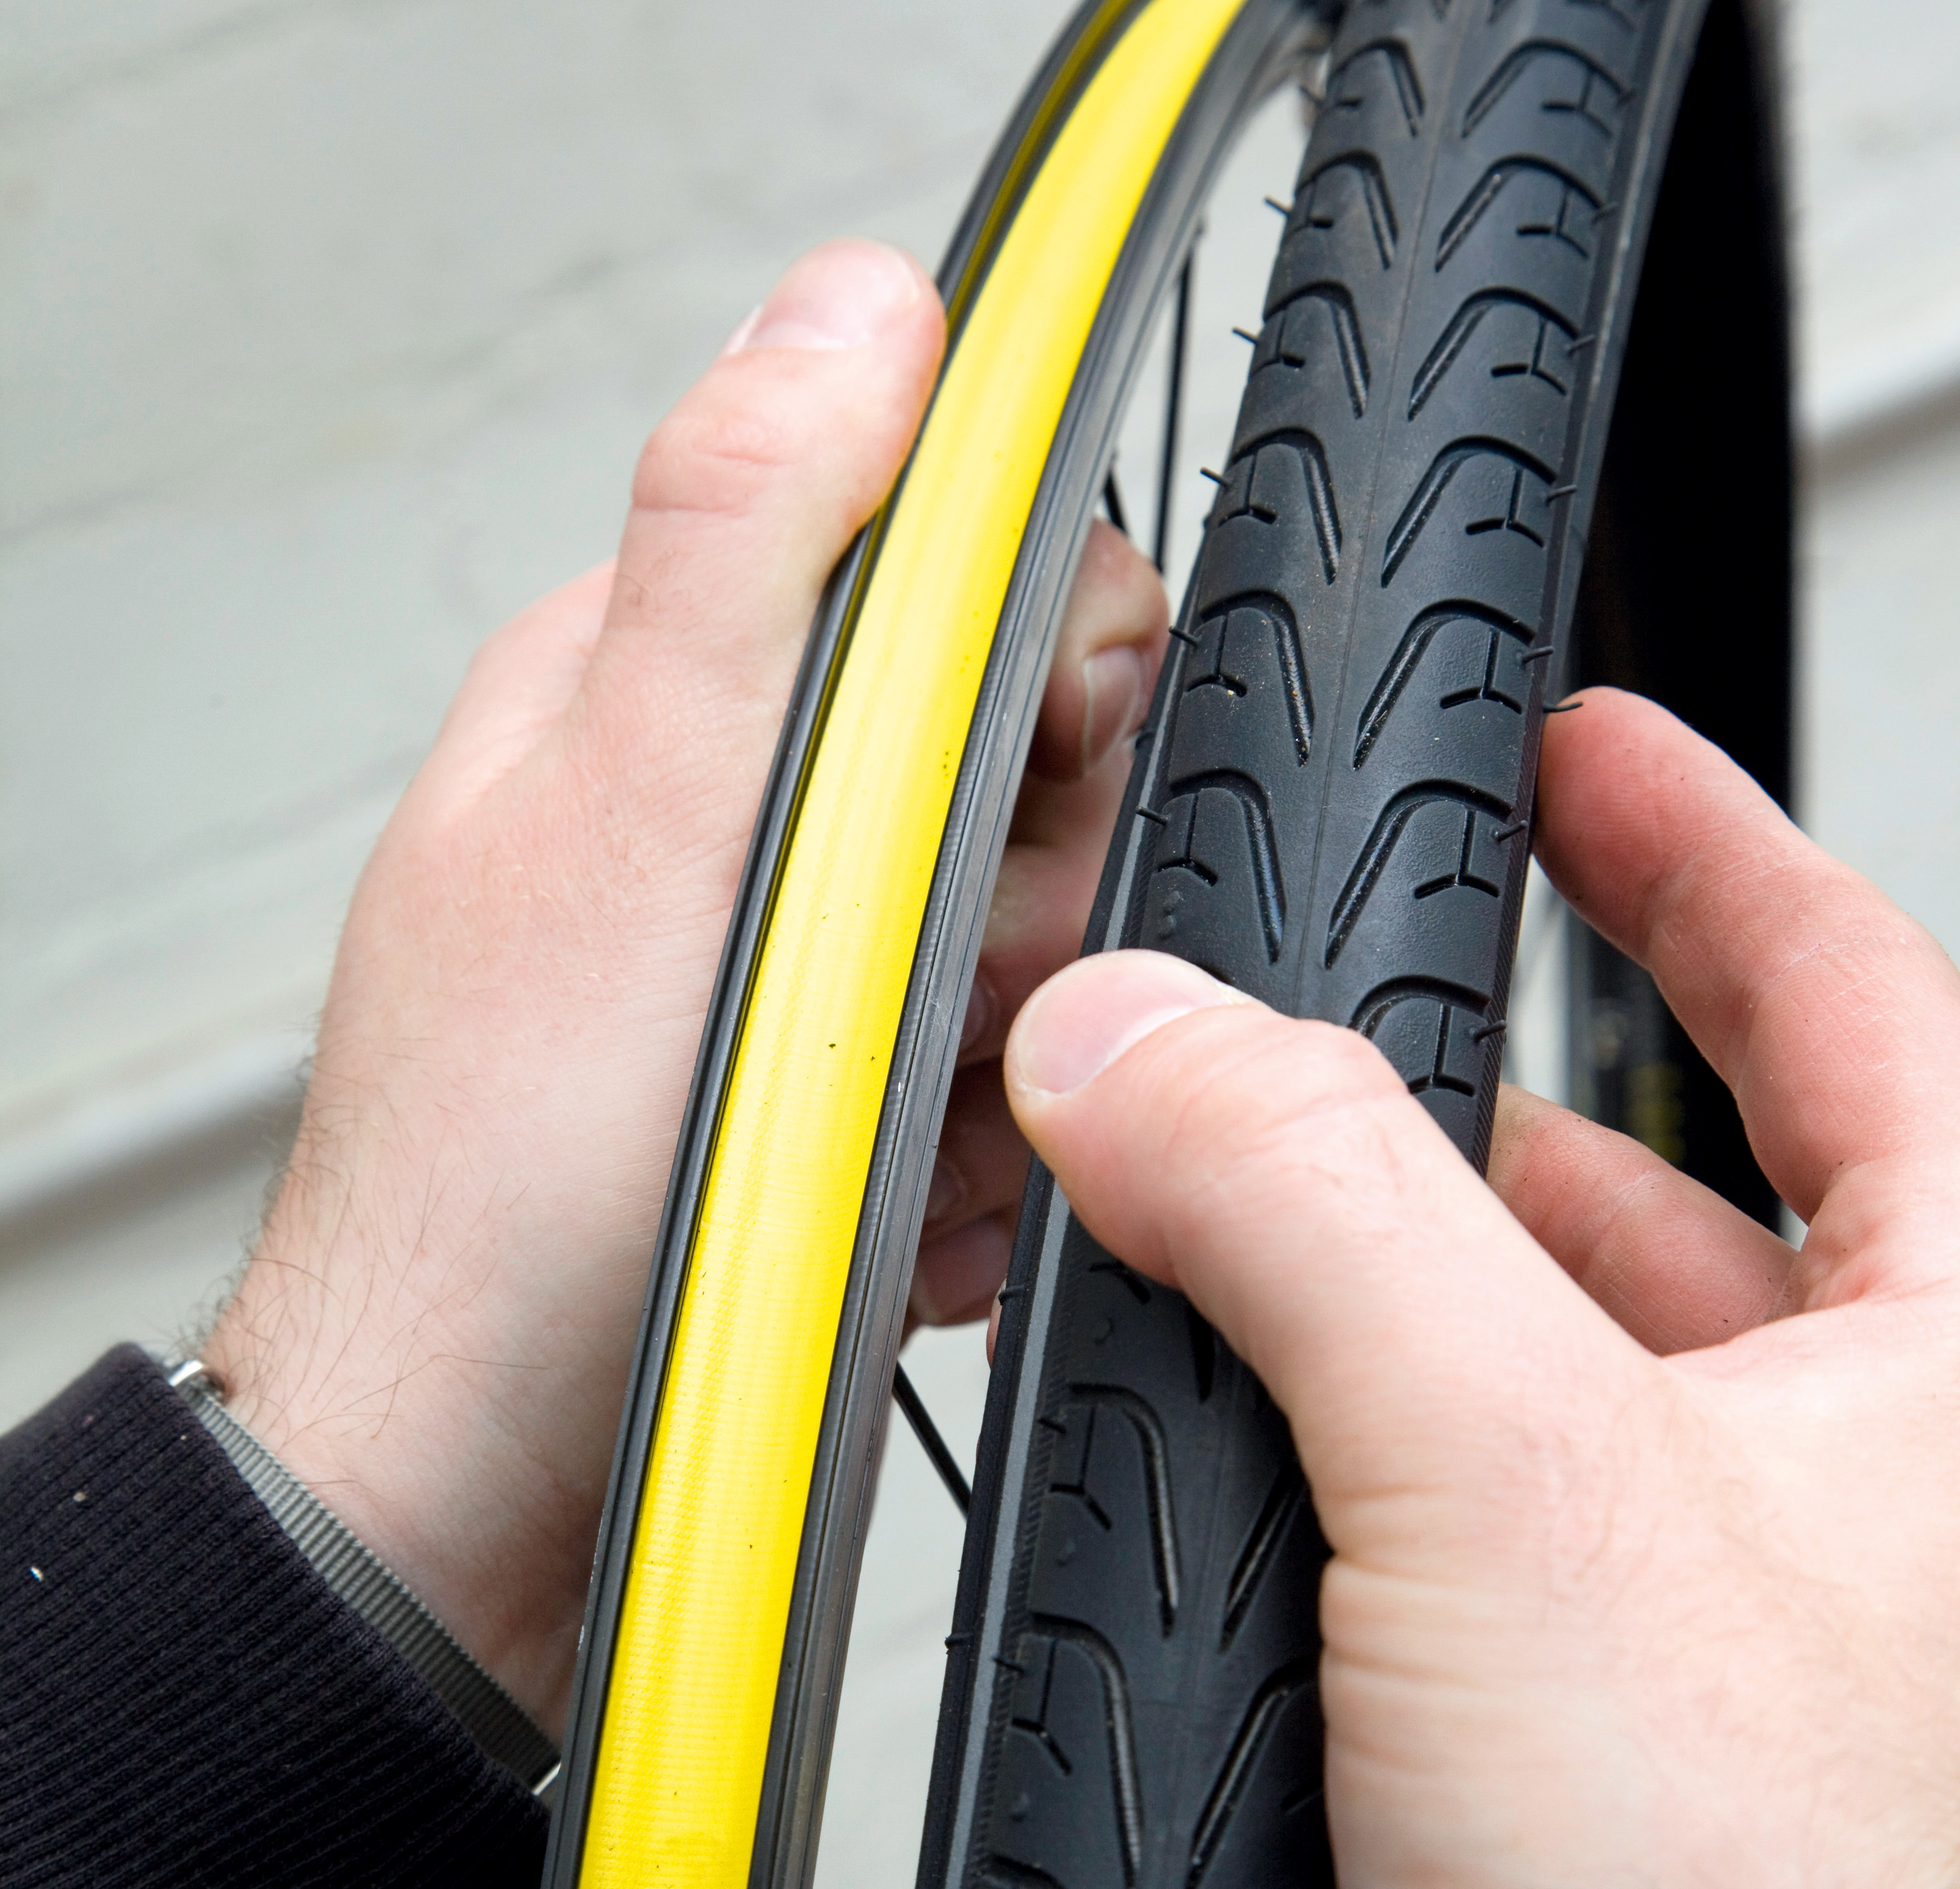
Step iii: use tyre levers to loosen the tyre
Use tyre levers to prize the tyre from the rim
Check the outside of the tyre for any articulate causes of the puncture. If y'all see whatever debris stuck in the outside of the rubber, remove it and make a mental note of where it is in relation to the valve.
Bear in mind you lot might not find anything, but DON'T check past rubbing the palm of your hand on the tyre as it could exist drinking glass or metal, and the concluding matter y'all need when trying to repair a puncture is a cutting on your mitt!
Gently insert two tyre levers between the tyre and the wheel rim - straight opposite the valve (yous can start anywhere but the further you are from the valve the easier it'll be).
Pull the tyre away from the rim using the tyre levers, 1 at a time. If y'all accept iii levers, hook the first two under the spokes and remove some more of the tyre with the third lever.
By now the tyre should exist loose enough to simply run a tyre lever around the wheel rim to remove the balance of the tyre. With experience, yous may only demand one tyre lever.
It's worth noting here that this can exist easier said than washed, and that some tyres and cycle combinations are notoriously tight.
The ease to which a tyre pops of a wheel rim can also depend on the safe compound. In general, the more robust a tyre, the harder information technology will be to remove.
The key here is to observe the sweet spot of a tyre that y'all tin can remove, while limiting the chances of puncturing in the first identify.
Enquire around as nearly local riders will have their go to brands of tyres, as the kinds of roads and terrain volition play a part in what works for your style of riding.
If in uncertainty, opt for a all/ iv flavour tyre. This should be mailable enough to pop off the rim with a bit of encouragement, but will limit the take a chance of puncturing as much equally possible.
Call up, if you can't remove it at dwelling house without assistance, you won't exist able to remove information technology on your own out on the bike in all weather condition, times of the day and temperatures. So if you demand to swop tyres, swop them!
Step 4: remove the tyre if yous need also
Take the tyre off the rim if you lot need likewise.
Pull out the inner tube, and, if you need too, accept the tyre off the wheel completely.
If the cause of the puncture was obvious, a thorn for instance, you tin probably leave 1 side of the tyre seated on the rim of the wheel, remove the object and and so keep to the conclusion on new tube or or repair the tube beneath.
If it'south not quite every bit clear why you have a bike puncture, then it's worth removing the tyre completely, equally per footstep 5 below.
Step 5: check the tyre for debris
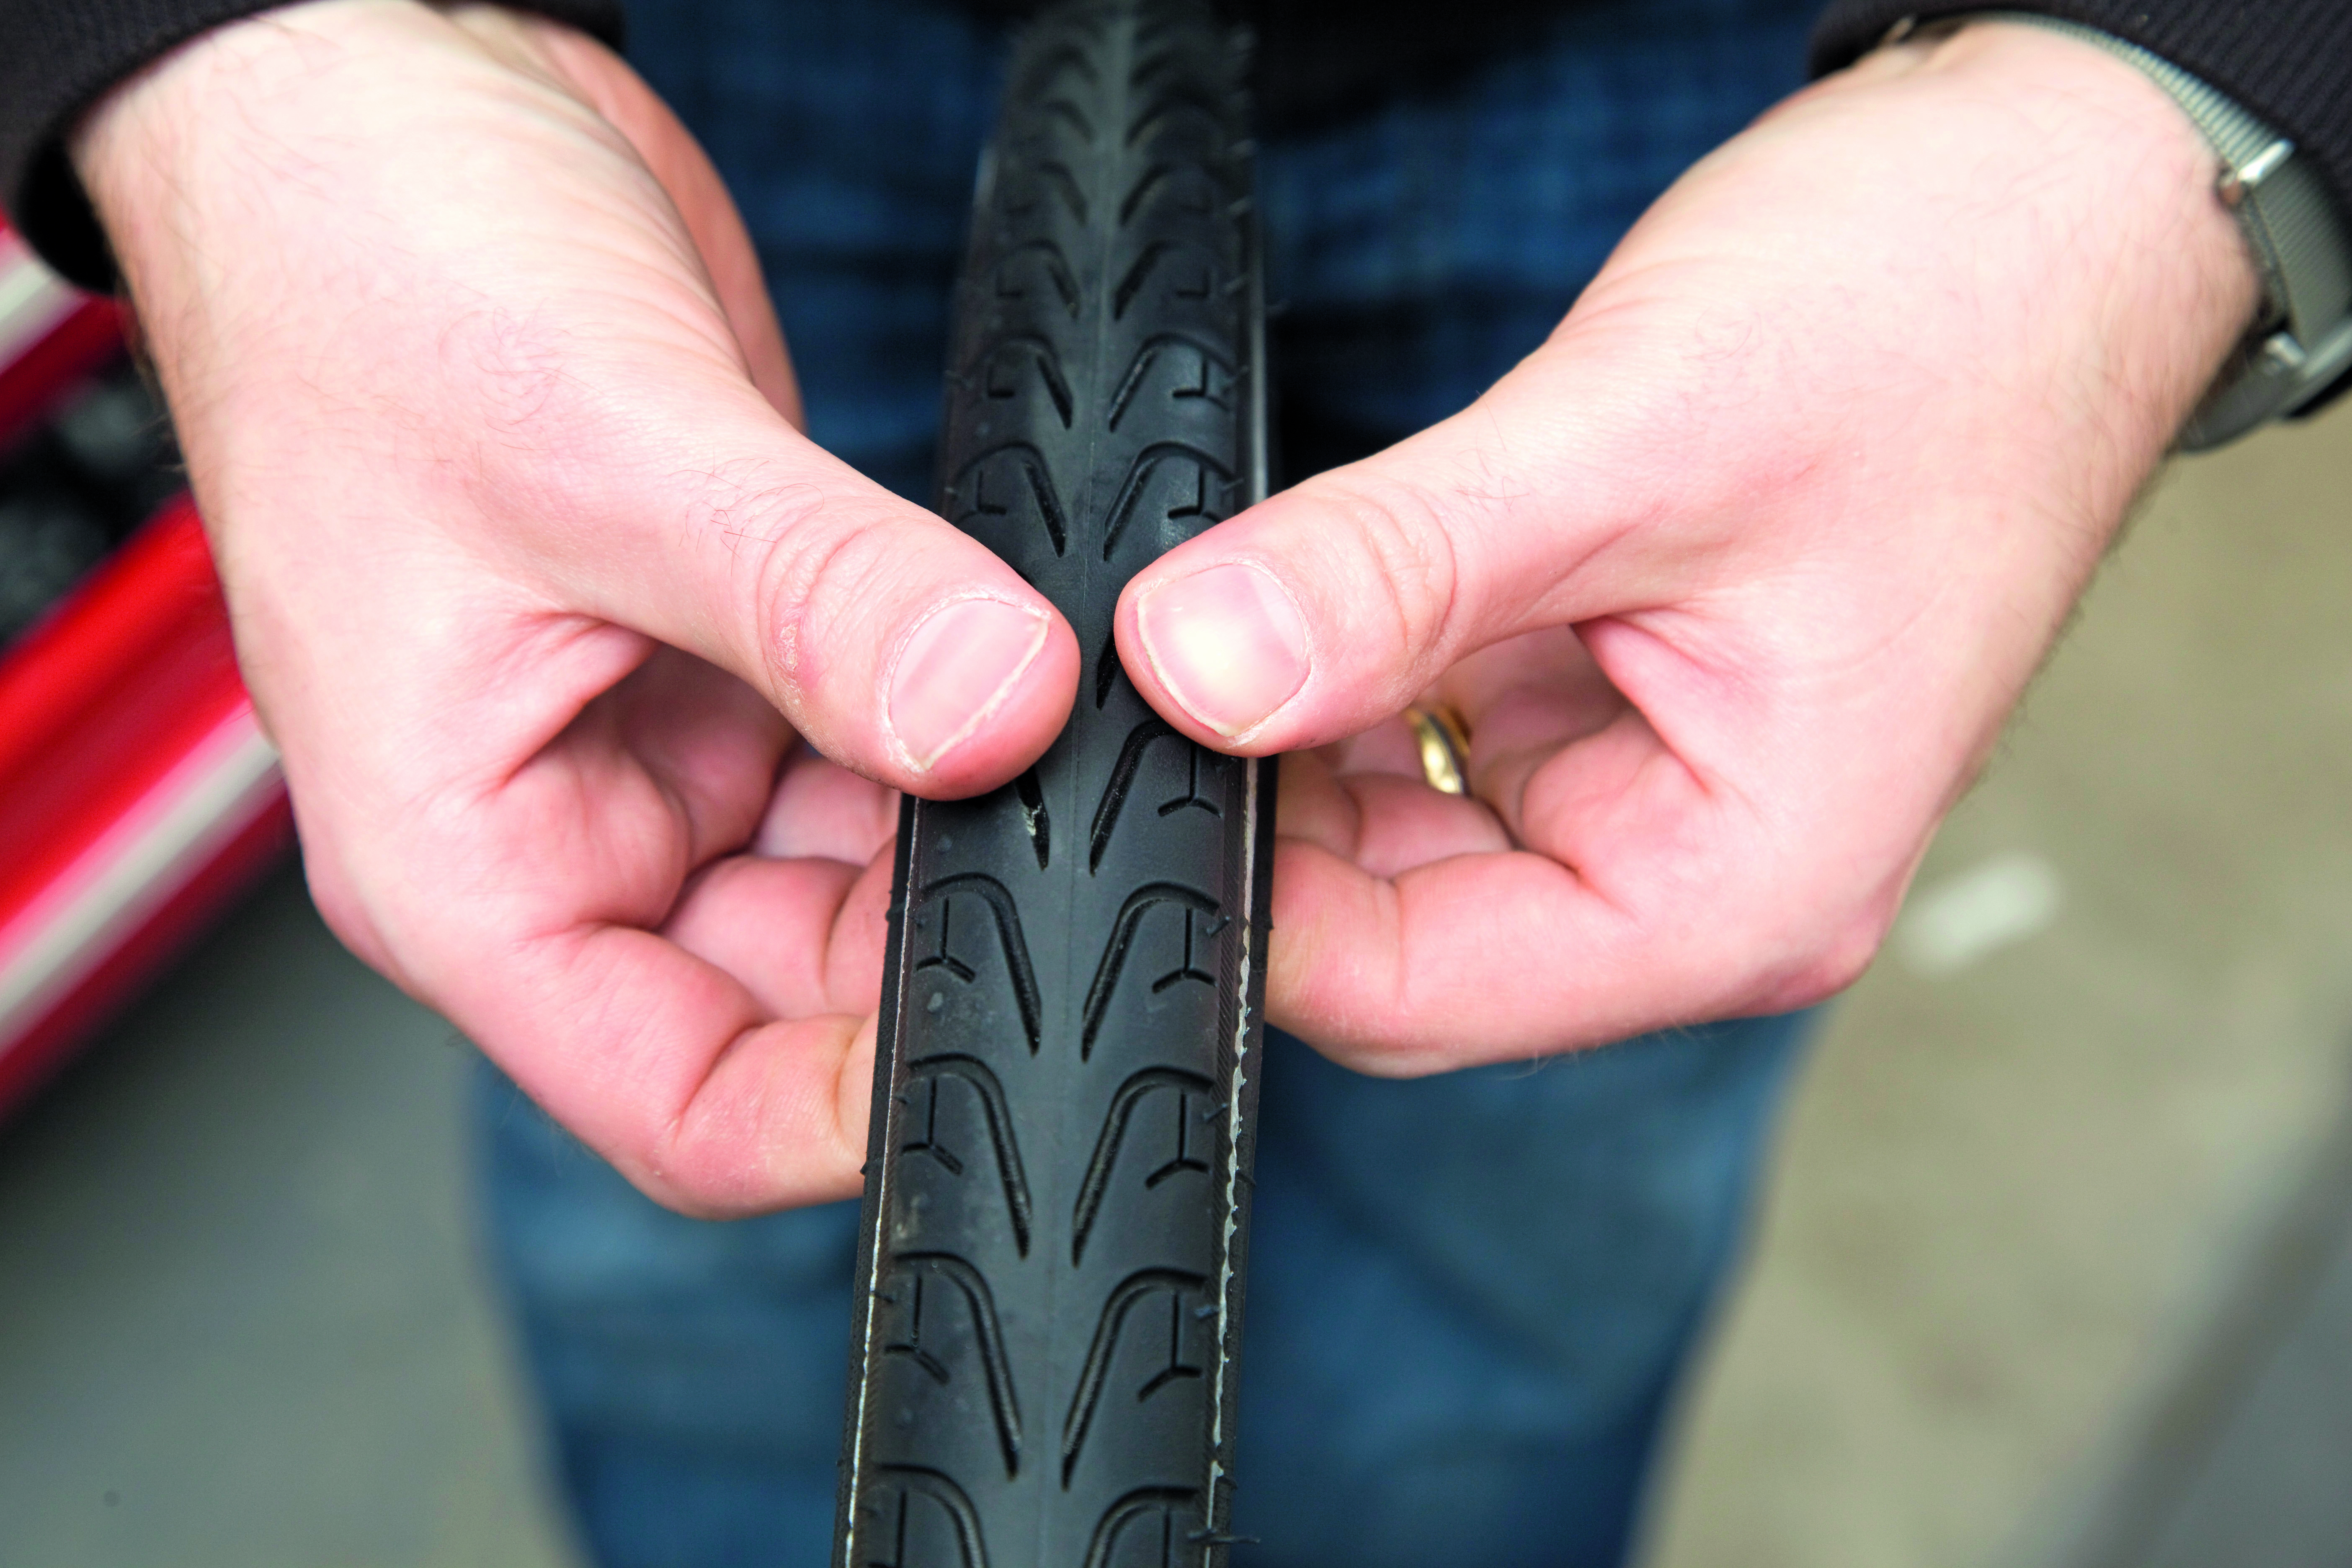
Gently and advisedly run your fingers along the tyre, checking for thorns or glass
If the perpetrator is unclear, turn the tyre inside out and having a good inspection before attempting to insert another tube.
If there is a puddle shut to hand, you could ever re-inflate the old tube and submerge each section looking for the bubbles of escaping air to assist locate the site of the puncture. You lot can then cross reference this to the tyre and focus on finding the cause.
Check that in that location are no farther holes in your inner tube. Then carefully run your fingers around the inside of the tyre to check there is zippo else penetrating the tyre - if y'all find anything (small pieces of glass, thorns, gravel), remove information technology. Non doing so can result in the dreaded double puncture. It's ordinarily possible to make a visual check of the tread while doing this.
Pace 6: decide on replace or repair
At this point you lot've got two choices - to mend the inner tube and supercede information technology, or just use a make new ane/ a pre-mended tube.
It'south usually easier to use a new or pre-mended tube out on the route. This cuts the time of the roadside down and gets you dorsum rolling equally swiftly every bit possible.
We cover how to mend the punctured inner tube below for when you get dwelling house and can do an unrushed chore.
Ever ensure that the spare tubes you lot carry have a valve long plenty for the depth of the wheels you are rolling on and a valve type that is compatible with 1 of the best bike pump (opens in new tab) or best Co2 inflators (opens in new tab) that you should be carrying.
Stride seven: put a little air in the tube
Add together a niggling air to the tube
Inflate the (patched or replacement) inner tube slightly so it merely becomes circular in shape. This helps terminate it pinching confronting the rim when you put it dorsum in.
Step 7: refit the tyre on one side and insert the tube
Refit the tyre
If you did remove the tyre completely, it's at present time to refit on one side. Brand sure the tread is pointing the right way.
Some tyres accept arrows on the sidewall indicating the 'direction of travel', other's are unidirectional and can exist fitted in any direction.
Put the valve in the valve hole, and tuck the inner tube into the space betwixt the tyre and the wheel rim.
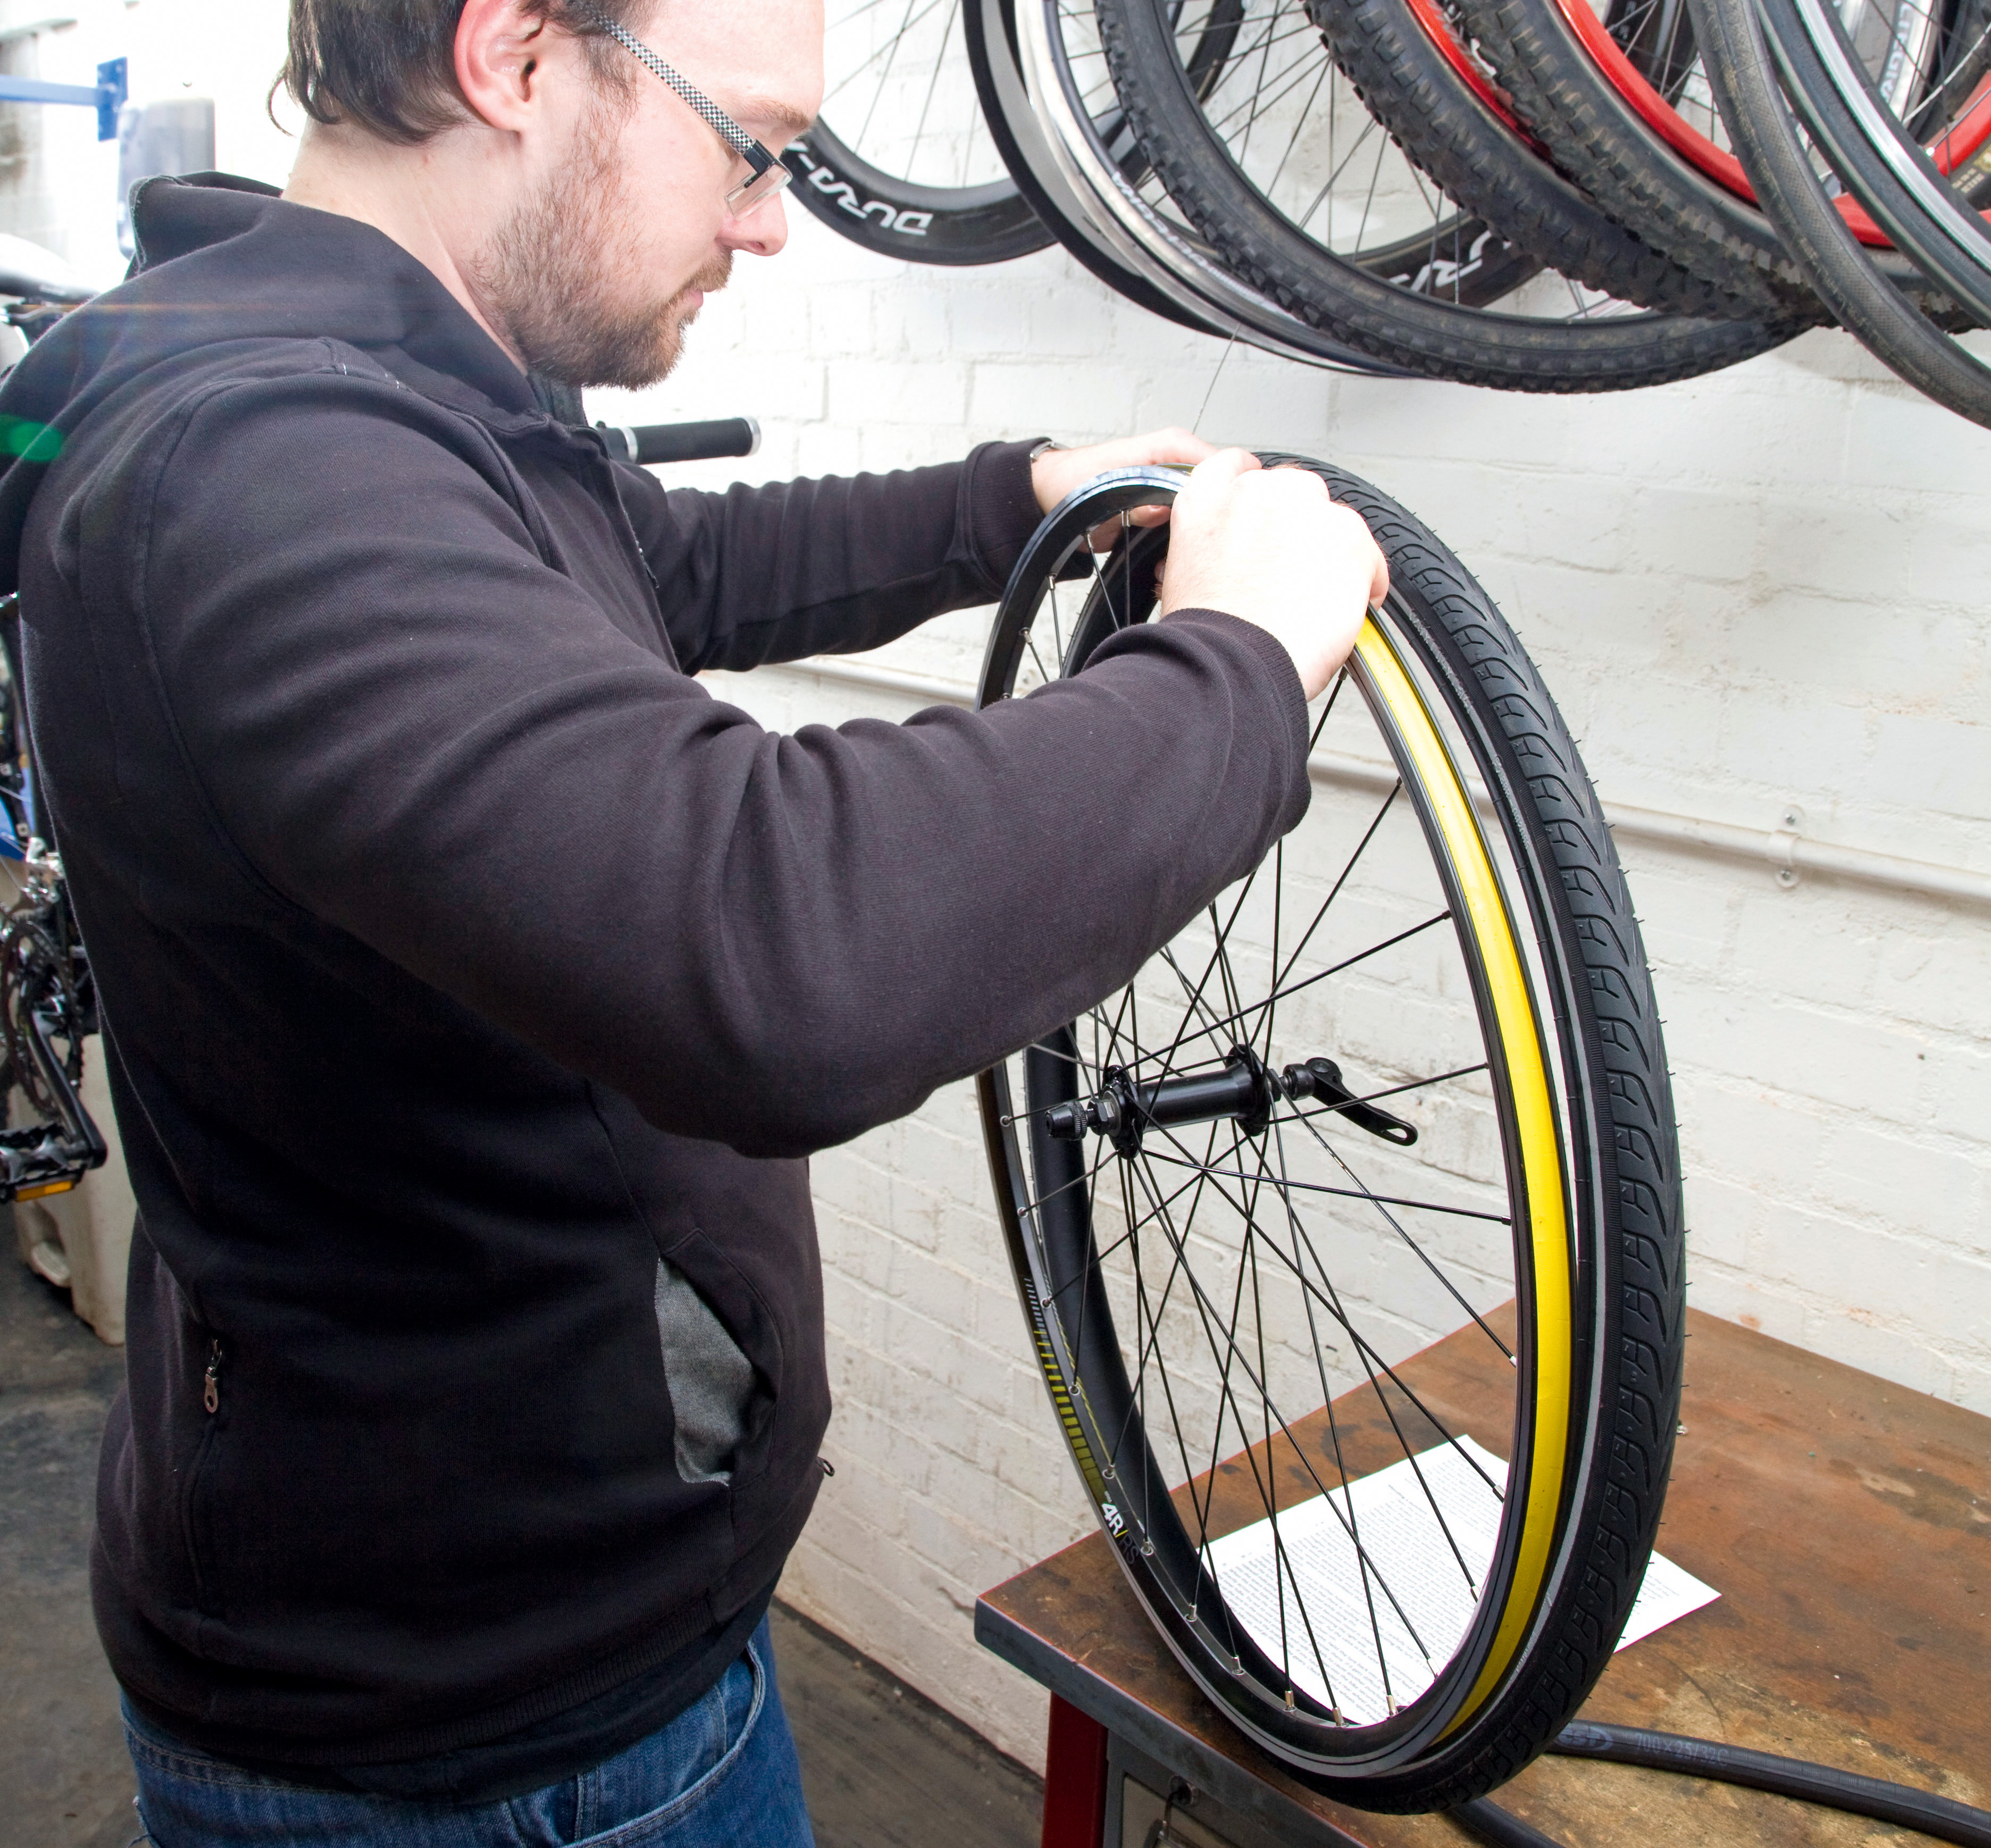
Step eight: refit the tyre completely
Seat the tyre back into the rim by pushing with your thumbs
When the inner tube is all in, ease the tyre back into place.
Starting at the valve, grip the rim of the wheel and push the tyre on to the rim, lifting at the aforementioned time to prevent the semi inflated tube getting pinched.
Attempt to terminate directly across from the valve equally the tyre will be looser in that location. If it gets difficult, let a little air out of the inner tube. Check in that location are no inner tube bulges from under the tyre, or that the tube isn't pinching under the tyre bead.
Y'all tin use tyre levers to assist with the last section, where the tyre is tightest - merely if possible avoid this equally they can pinch the tube and cause you to have to start all over once again.
The tougher and newer the tyre, the harder this will be - by dissimilarity well used, supple summer tyres are usually much easier to get dorsum on the rim.
Step 9: fully re-inflate the tube
Attach the pump to the valve and pump it upward
(Prototype credit: Getty )
Pump upwards the tyre to every bit shut to the you ideal pressure, it's worth checking our guide to what's the correct road wheel tyre force per unit area (opens in new tab) if yous are unsure.
Ideally this would exist washed before you lot reinsert and refit the wheel into the wheel securely, this just allows you lot to double check it'due south seated properly before total aggrandizement.
If you are using a mini pump, you are unlikely to be able to inflate to total pressure, and even with CO2, you lot'll accept to make a rough guestimate at the pressure level. And so be comfortable with getting the squish feel of your tyres at different pressures, and then you lot can arrange your riding accordingly.
Once the wheel is back on the bike, shut the brake quick release lever or reattach the brake cable if needed. If y'all take mended a rear wheel puncture, get someone to hold the bike upward, and get through the gears. Check that the wheel spins freely and the brakes work correctly.
How to mend a punctured inner tube
Utilize a patch to the inner tube if you're mending it
Inner tubes can be quite expensive, and they're like shooting fish in a barrel to fix and so information technology'due south a skillful idea to mend them instead of simply replacing one and chucking the former prophylactic.
If the puncture is non obvious, pump up the inner tube. Once inflated, it is usually piece of cake to hear the air escaping. If not, run the inner tube past your lips to sense the escaping air.
If you are even so struggling to find the culprit, you can ever submerge a re-inflated tube in a saucepan or sink of water, and (like the puddle approach mentioned above) you lot should see the tell tale signs of bubbling where air is escaping.
Once located, roughen the area around the pigsty thoroughly with the emery paper in your puncture outfit.
Remove any backlog emery or tyre dust and utilize enough glue to cover an area a little bigger than the repair patch that you'll apply.
Do this a couple of times, allowing the gum to dry between applications. Afterward the last application of glue, take a patch, remove the backing, and stick information technology on the inner tube. Press information technology home, working from the centre outwards. When you are confident that the glue is dry out, carefully remove any further movie attached to the patch.
In that location are patches that are cocky adhesive, which negates the glue faff so if you're time poor, these practice speed things up a trivial, and are as well a skillful choice for a road side repair emergency.
How do I know what inner tube I need?
What are the dissimilar tubes and valve types?
In general there are ii types of valve, Presta and Shrader Valve.
A Shrader valve is the same as y'all'll find on a motorcar tyre and to inflate it you just take to utilise a pump with a compatible adapter. To deflate it you take to push button a little pivot found inside the valve.
Presta valves are thinner with a small captive nut found nigh the top. To inflate you need to unscrew the convict nut fully before using a pump with a suitable adapter. To deflate yous unscrew the captive nut, then push button information technology 'in' towards the base of the valve.
There are several unlike types of tubes on the market, which vary in material, condom or latex for example, or in puncture protection level.
Bank check your spare tubes have the right valves and that they're long enough for your rims. People frequently upgrade wheels to deep section rims, but forget to get new spare tubes with longer valves.
Finally, also check you have a compatible pump or inflator. Nearly volition cater for both presta valves and shrader valves, simply it'due south better to exist safety than distressing.
We mentioned information technology above, but do check out our guide on bike inner tubes (opens in new tab) to help you navigate to the correct choice for you.
Why do I keep getting punctures?
How tin I stop getting apartment tyres on the bike?
If you lot discover you're getting regular punctures, it'due south a good idea to check your tyres are still in good condition and appropriate for the type of riding you're doing.
Choice of tyres is nigh as important equally the wheels or frame. Kickoff of all your tyres demand to be the correct size to fit your wheels. They need to be pumped up the appropriate pressure, as mentioned above.
Too much pressure could blow the tyre off the rim and too low a pressure will permit pinch punctures and tyre wall, or rim damage.
It's also best if they are the right tread for the surface that you are riding on, the time of twelvemonth and what riding y'all'll be doing.
Tyres that are smooth because they are worn out are useless and dangerous. Tyres that take a series of tiny cracks in the sidewalls or between the tread blocks demand replacing also.
From fourth dimension to time, a tyre may take some internal damage which results in a bulge somewhere effectually its circumference; this is another occasion when the only remedy is a new tyre.
Finally, the inner tube: brand certain any replacement inner tube is the right size for the tyre, and you have the right blazon of valve to fit through the pigsty in the bicycle rim. See below for valve types.
Can you fix a ripped tyre?
Tin can I ride a cycle tyre with a hole in information technology?
If the hole in the tyre is large, this may crusade the inner tube to bulge through the gap, like a hernia. If this is the instance, replacing the tube will but result in some other puncture.
The solution is to reinforce the hole, with an quondam slice of tyre from the inside. In desperate situations we have even seen energy gel wrappers used for this purpose. This solution is an emergency set up all the same, and should only be used to get yous home or to your nearest bike shop.
Don't ride on adamant to hitting your mileage target only to become more stranded when the tyre completely fails.
Things to deport on any ride
- Tyre levers
- Two (or more than!) spare inner tubes
- Patches/repair kit
- Some bits of quondam tyre to reinforce large holes
- A pump
- A mobile phone: if all else fails, get a elevator dwelling before hypothermia sets in


How To Repair Bike Tire Puncture,
Source: https://www.cyclingweekly.com/news/product-news/fix-a-puncture-142674
Posted by: vuthistil.blogspot.com
0 Response to "How To Repair Bike Tire Puncture"
Post a Comment